Today starts a small series of articles about our latest project build. If you haven’t noticed, LanOC staff takes a very big interest in LAN events including hosting our own in Northwest Ohio twice a year. Anyone who has packed all of their equipment up to come out to a LAN or two will completely understand why I prefer to build a PC specifically for coming out to events. My main PC the “Fridge” is literally larger than a mini fridge. It is a complete monster and is extremely eye catching, but when it takes two people and a large vehicle to get it out to an event you really start to wish you had something smaller. This is why for the past few years I have been using my “Lunchbox” builds at any event where I just want to kick back and enjoy myself. This project build is for Lunchbox 3, over the next few days I will go over its components and then show off its performance.
See Part 2 Here - See Part 3 Here
Project Supported by: Lian Li, Asus, Kingston, Silverstone, Seagate, and Noctua
A special thank you to the companies above who helped make this project a reality!
Written by: Wes
Pictures by: Wes
Previous builds
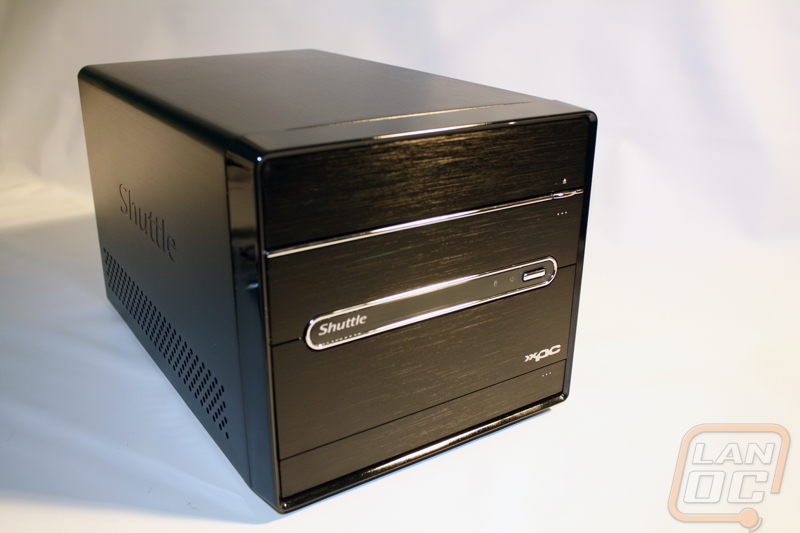
To start things off let’s take a look at the last two events to get a feel for the previous Lunchbox builds. If you have been following LanOC Reviews over the last few years you have most likely seen these at some point. My first lunchbox was back three and a half years ago with the Shuttle SP45H7. This build (at its peak) consisted of a Shuttle SP45H7 with a Q6600 quad core CPU, 4 gigs of Mushkin DDR2, an HD4777 video card, a 2TB Western Digital Black hard drive for capacity and a 600 gig Western Digital Velociraptor for OS and Steam duty. It used the built in Shuttle cooling and power supply but the performance for the time was blazing fast, something what really surprised people at LANs considering its small size.
Lunchbox 2 is more recent and took things up a notch. I’ve wrote about this build a few times, including this May when I gave the build a refresh. Lunchbox 2’s component breakdown (at its peak).
Asus P8Z77-I Deluxe Motherboard
8 Gigs of Kingston RAM
Seagate Momentous XT 750 Gb
Thermalright AXP-100 for CPU cooling
Lunchbox 2 is, still to this day a monster, but once I went with the SFX PSU I figured out that I could go even smaller and even upgrade a few things along the way. That is where Lunchbox 3 finally started.

Motherboard and CPU
When it came time to pick a CPU and a motherboard, I already knew I needed to go with a Mini-ITX motherboard and considering how high that Lunchbox 2 set the mark with the i7-2700 my only real option was to go with Intel. In order to go all out the only option was to go with a new Haswell CPU, specifically the i7-4770K that I reviewed this June. I would have loved to go with the Ivy Bridge-E CPU with six cores, but there aren’t any 2011 socket Mini-ITX boards. So to go with our i7-4770K I stuck with an Asus board just like I did with Lunchbox 2, because it performed amazing for me. I was really hoping to go with the Asus Impact due to its improved audio card, but the Z87I-Deluxe had all of the other features that I needed and more.
The Asus Z87I-Deluxe has the same gold styling that Asus uses on their mainstream boards, a change from the blue that they used on the Z77I-Deluxe. Asus packed every possible feature in on this board including wireless AC, 12+2 DIGI+ Power Control, and all of the features that come with using their AI Suite 3 including USB 3.0 boost. It’s the details that make a motherboard great, so let’s take a look at what you get with the Z87I-Deluxe.
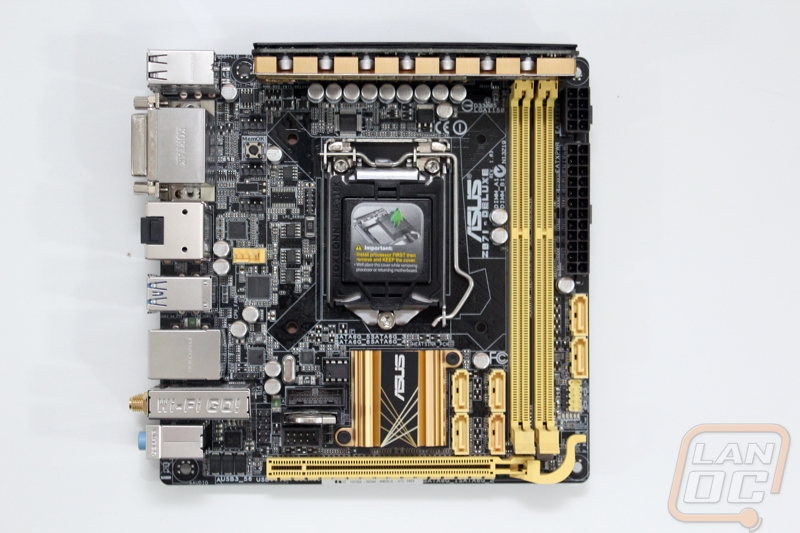
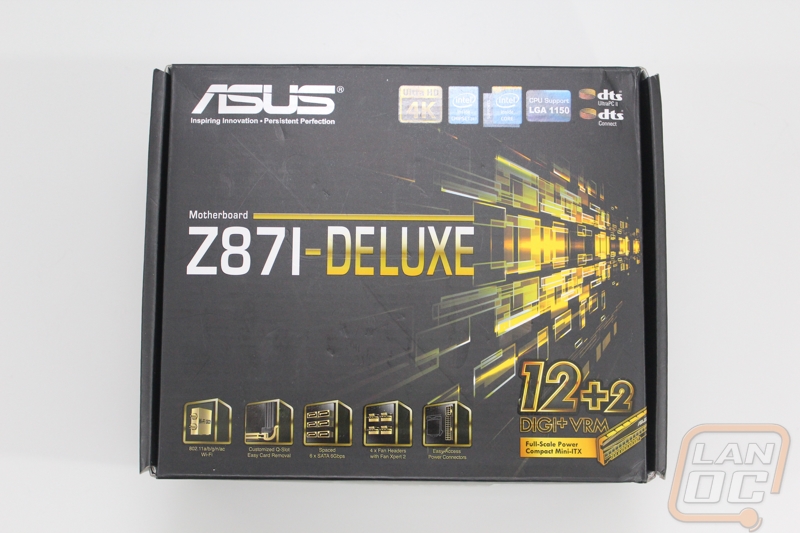
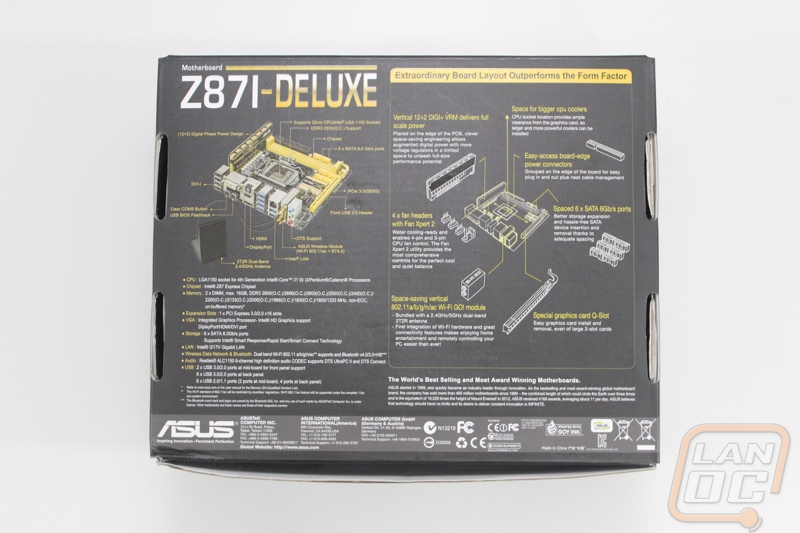
First let’s take a look at the packaging for the Z87I-Deluxe. Overall Asus went with the same black and gold styling that I saw on our other Z87 mainstream board reviews from Asus. The cover of the box does pack in everything you need to know about the board in a small area including the name, a few key features, and the 12+2 DIGI+VRM is highlighted in the bottom right corner. On the back of the box there is a full specification listing with a photo of the board itself just above it. Each of the boards features are highlighted with lines drawn to them on the board photo. On the right side there are even more details on a few of its key features, showing off what Asus was able to pack into this Mini-ITX motherboard.
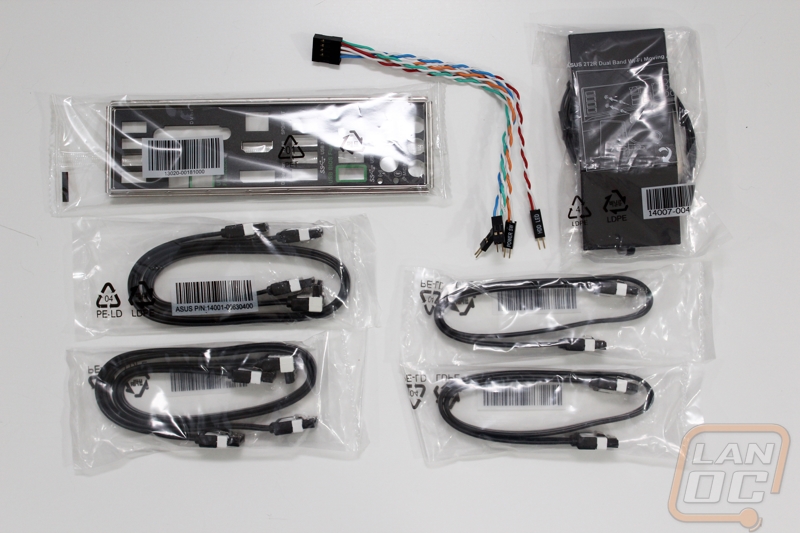
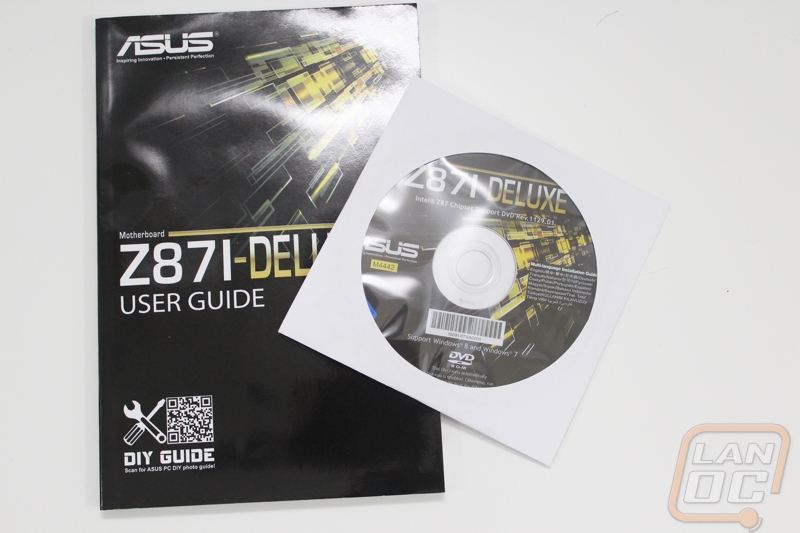
Inside the box, along with the board itself, you get a whole pile of accessories. All laid out, the accessories actually take up a lot more space than the board does itself. You get six SATA cables, your rear I/O plate, the wireless antenna, and a new version of Asus’s Q-Connector that helps finding your front panel connections a little easier in a small Mini-ITX case. You also get a full user guide along with a driver and software disc.
Starting up in the top left side of things, behind the rear I/O panel you have the MemOK! Button tucked away. Just below it there are three four pin PWM fan headers included the yellow one that is for the CPU heatsink.
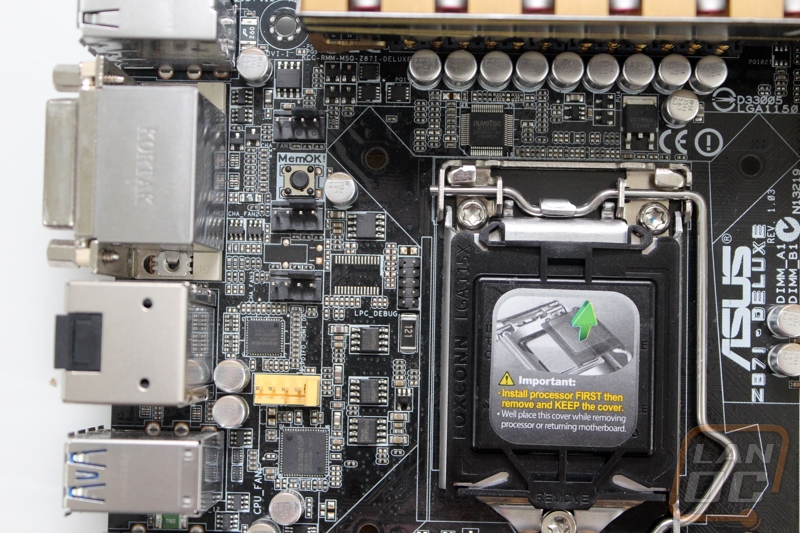
Over on the right side of the Z87I-Deluxe next to the CPU you have two yellow DIMM slots. For power, I love that Asus put the 8 pin and 24 pin power connections next to each other. Not only is this much easier for this small board, I think it would be great to have on all motherboards. The 8 pin CPU power connection is always a major pain to deal with when it is up on the top left corner of the board.
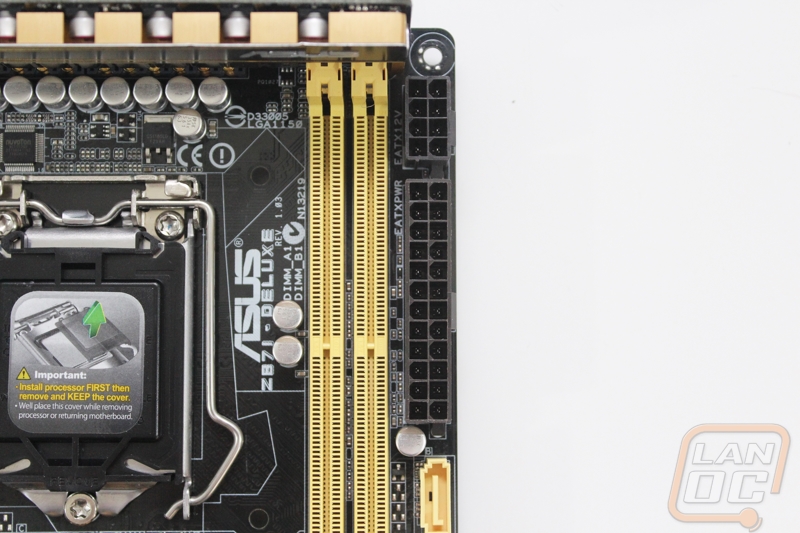
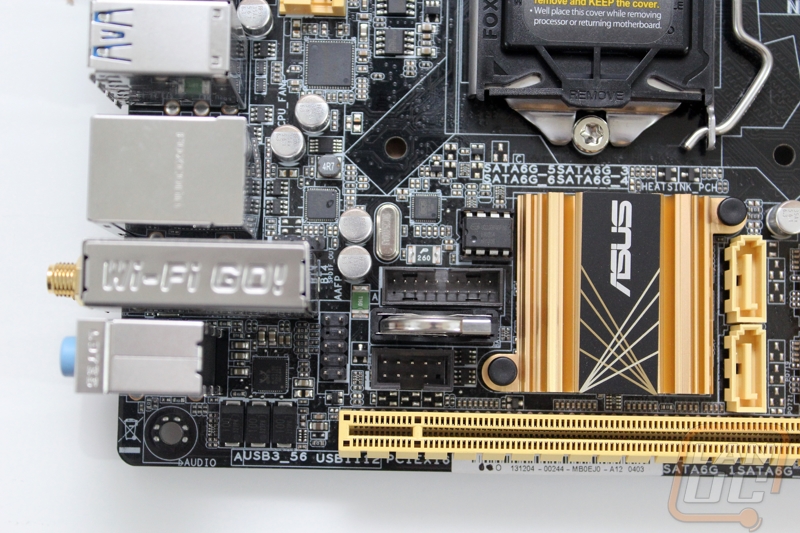
In the bottom right corner we have all six of the SATA 6 ports for the Z87I-Deluxe as well as the front panel header. The SATA ports are spaced out more than you would normally see, this gives you a little room work when you have SATA cables with lock clips. I also love the large PCI release button as well. They remembered that getting to a normal release button wouldn’t work in a tight case with a dual slot card in place, especially with the DIMM slots right up against the PCI Express slot.
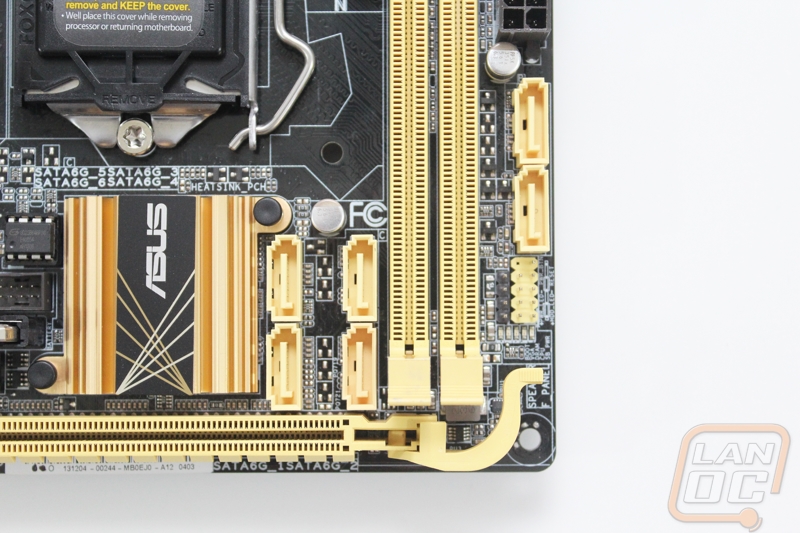
Down in the bottom left corner we have everything else. You can see the front panel audio connection just below the vertical BIOS battery as well as the USB 3.0 header above the battery. The Z87I-Deluxe only has one PCI slot and of course that slot is a PCI Express x16 for video card use.
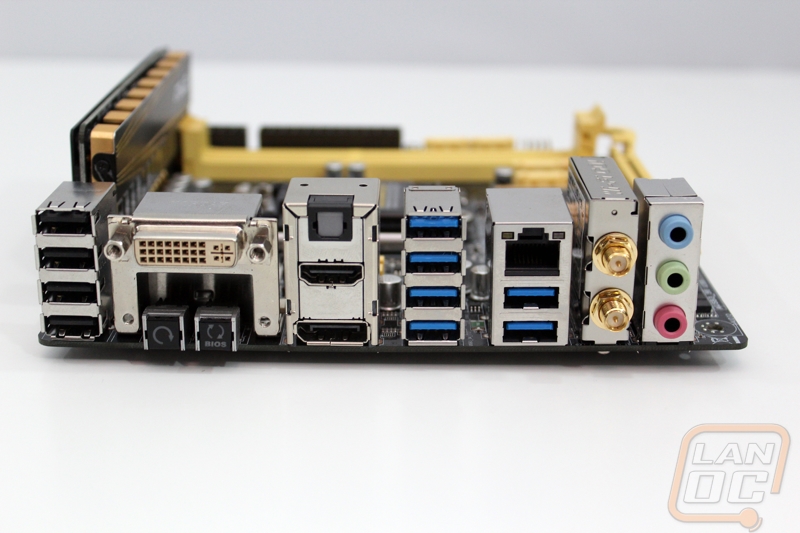
Much like the rest of the Z87I-Deluxe, Asus packed the entire rear I/O panel full. You get four USB 2.0 posts and six USB 3.0 ports as well for a total of ten USB ports. For audio you have three audio ports, one input, one out, and one mic input. Next to the audio ports they also slipped in two antenna ports. They went all out on the wireless; you have 802.11ac along with Bluetooth 4.0. This is a major improvement where most boards still have wireless N when they include wireless. For Ethernet you get a gig Intel NIC that is tucked in above the USB 3.0 ports. For onboard video connection options you have DisplayPort, HDMI, and DVI. They also included an optical audio connection for those who are looking to use this in an HTPC. Lastly, you have two buttons up under the DVI connection. One is a clear CMOS button while the other is for USB BIOS Flashback. USB BIOS Flashback allows you to update the BIOS quickly, and even without a CPU or RAM in the board if needed.
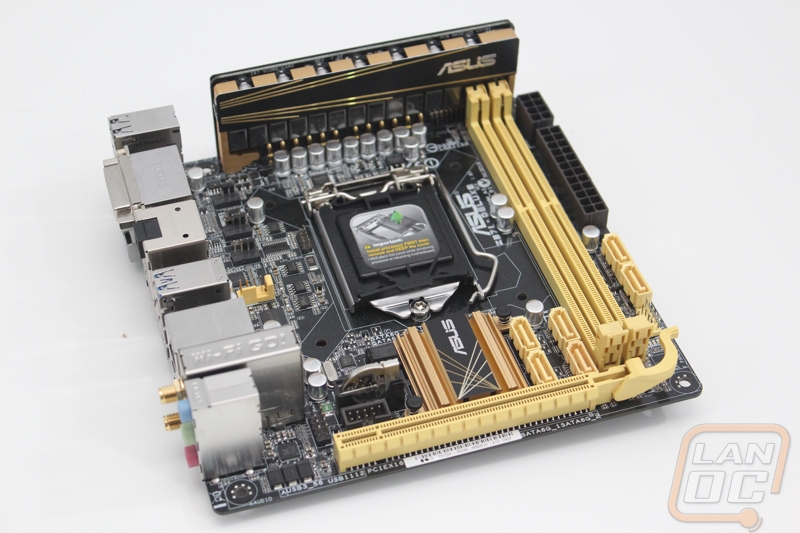
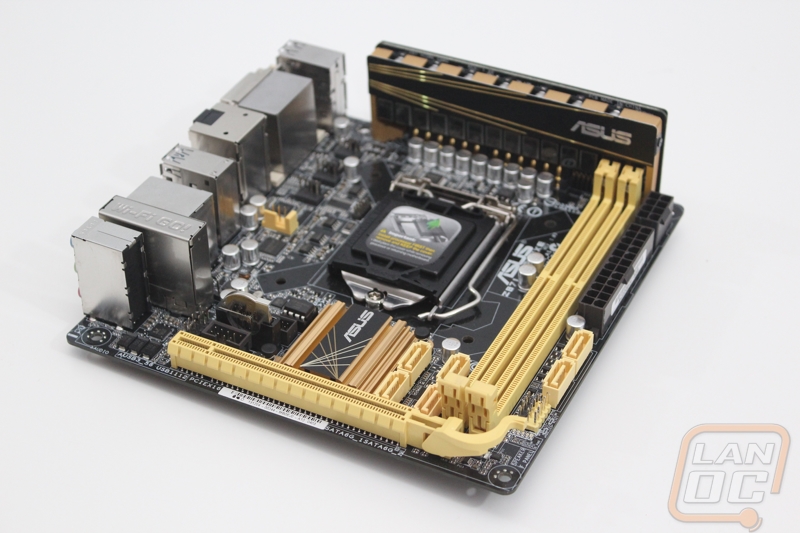
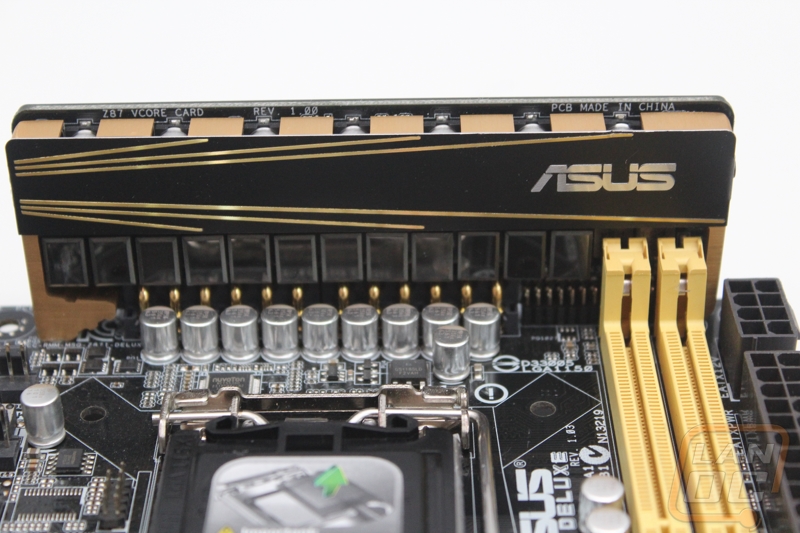
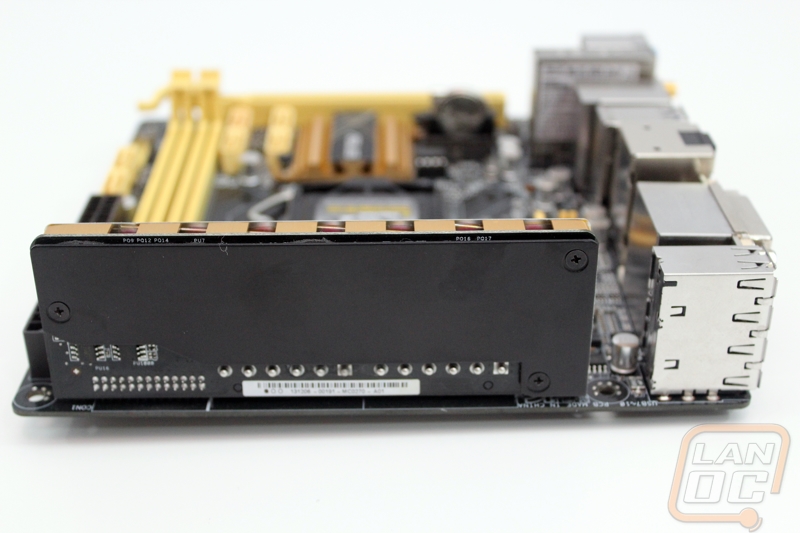
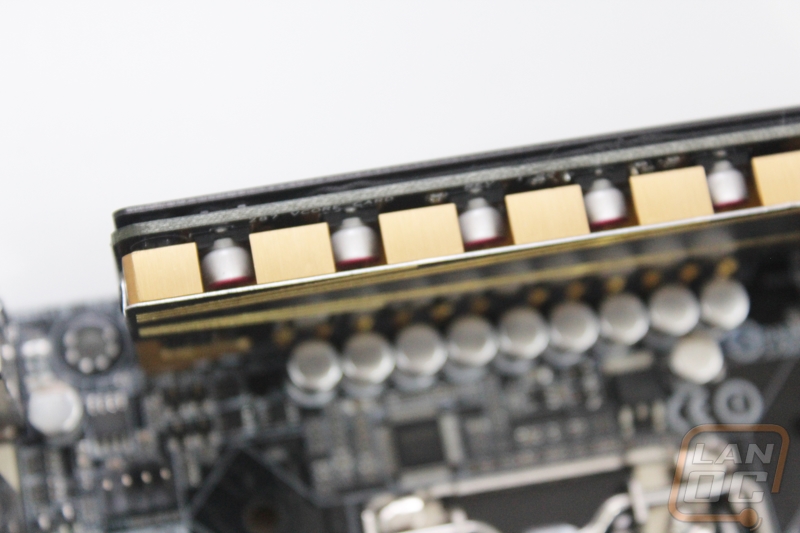
One of the key features of the Z87I-Deluxe is Asus’s unique way of packing in their DIGI+ VRM with 12+2 Digital Power Phases into a Mini-ITX form factor. This is a typical issue on Mini-ITX motherboards, they have to pack so many features into such a small space that they normal cut back. Asus wanted to provide the same experience that you would get on a higher end board in the small form factor, including the power to overclock and push the limit if you would like. In fact in my testing of their previous I-Deluxe motherboard showed that the I-Deluxe overclocked competed with Asus’s high end boards.
The raised circuit board has a gold heatsink on it to help keep everything cool. The riser PCB does take up more space so when you are picking a heatsink and even case you do have to keep it in mind. To protect the PCB from shorting out in a tight fitting case, Asus put a black backplate on it to keep things safe. The vertical VRM is without a doubt the most unique feature on the board. Last year I wasn’t sure how it would work out, but having used the Z77I-Deluxe, I have no doubt that this the boards most important feature.
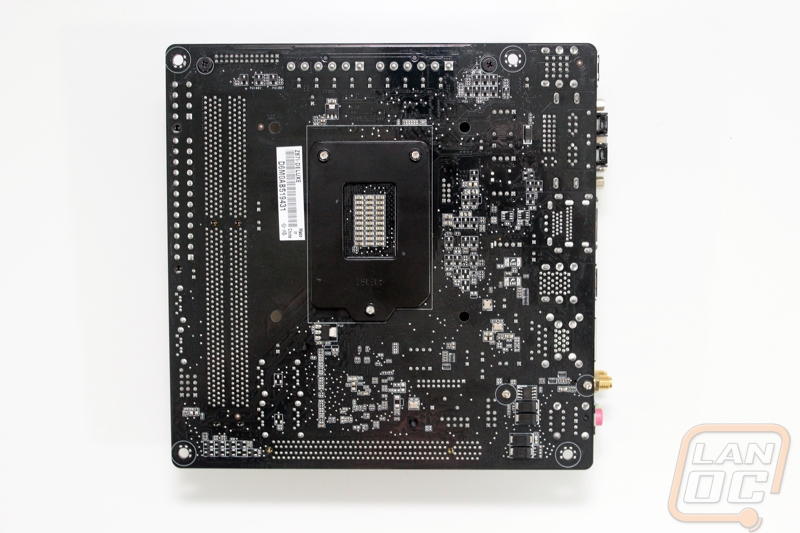
Even though you may never see it, Asus still went with a full black PCB. I think looking at the bottom of the Z87I-Deluxe it’s easy to see how tight Asus packed this PCB. There just isn’t any wasted space anywhere.
Storage and Memory
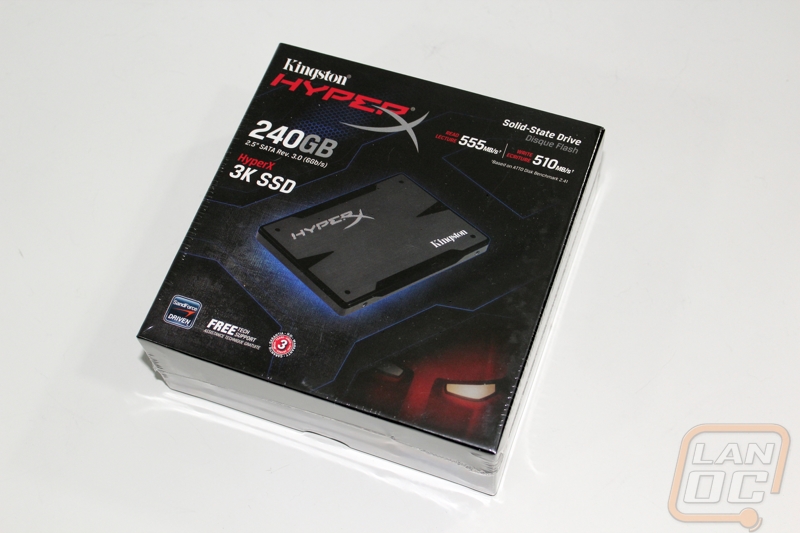
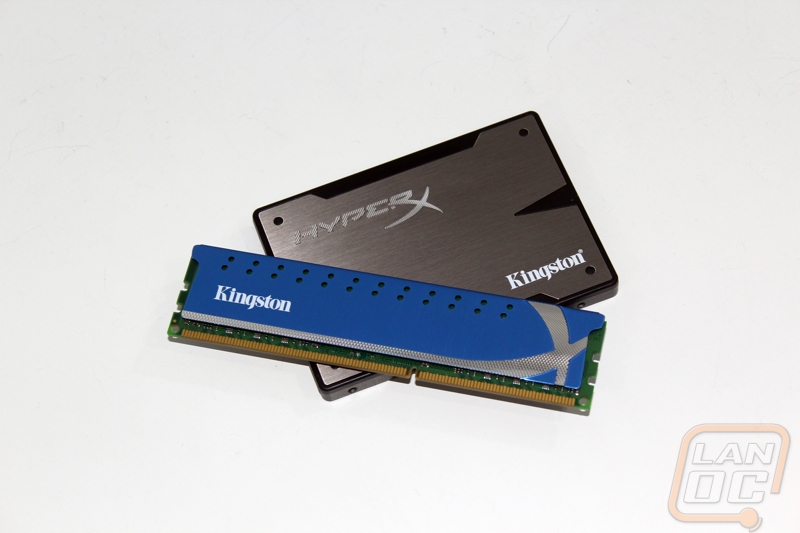
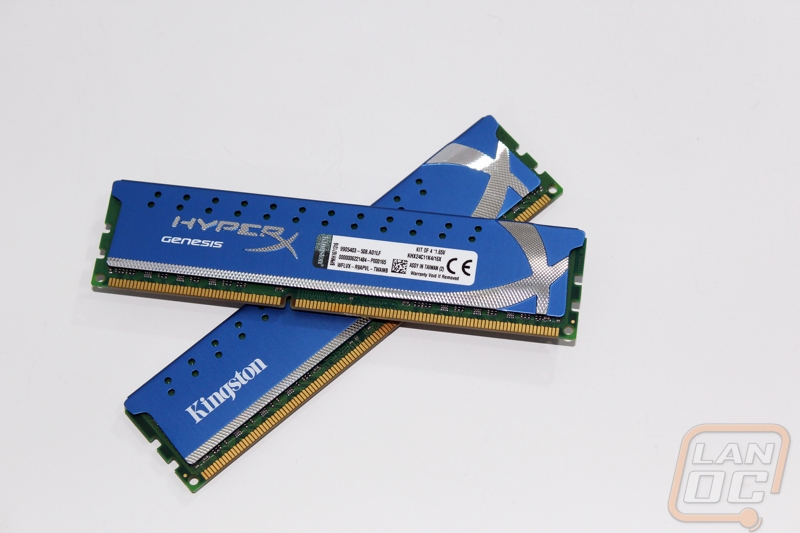
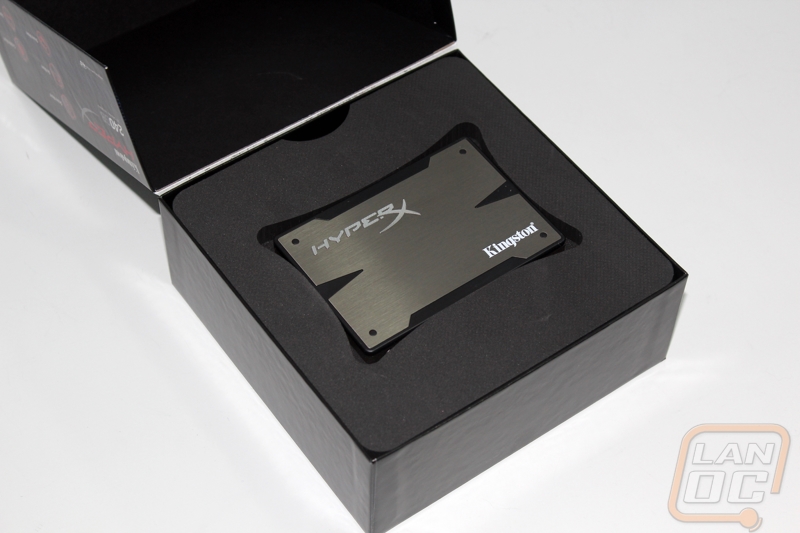
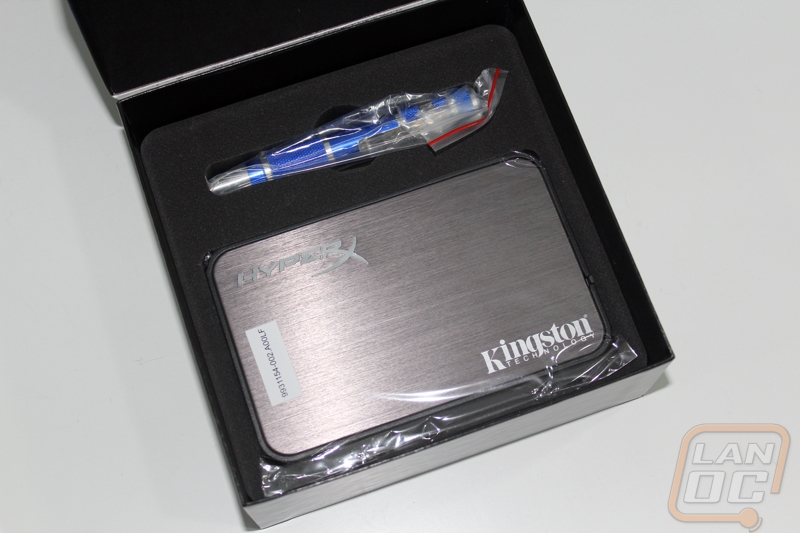
When it came to both RAM and an SSD for Lunchbox 3 I called up our good friends over at Kingston to see if they had anything sitting around. I have been using their HyperX RAM and SSDs in most of our test benches and in the Fridge and they have been rock solid reliable. When it comes to packing up and driving hours away to an event, the last thing I want to happen is have an SSD fail. I decided to go with their standard height HyperX Genesis ram to prevent any fitment issues in a small build. For SSDs from Kingston, there is really only one good option outside of their business and value lines, which would be the HyperX 3K. With a read speak of 555MB/s and a write speed of 510MB/s the HyperX 3K is among the fastest drives available, and let’s be honest it looks great as well. To house my OS and anything else that needs that speed I went with a 240GB model, a step up from Lunchbox 2.
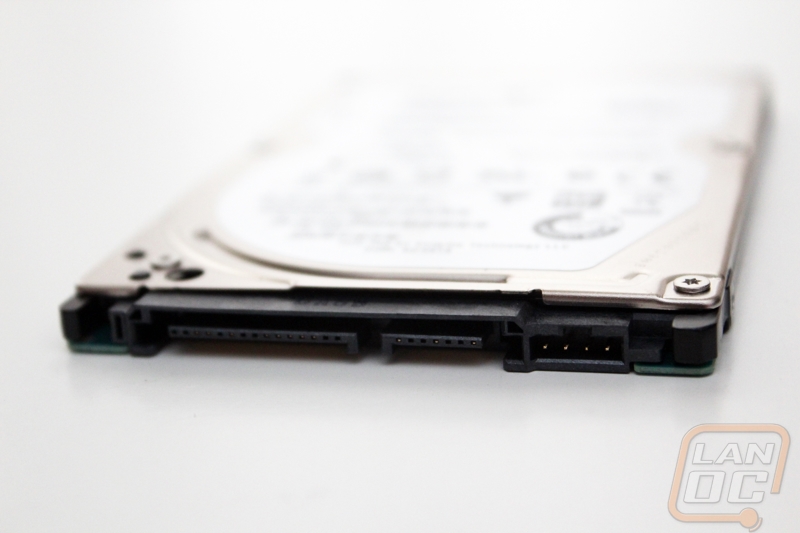
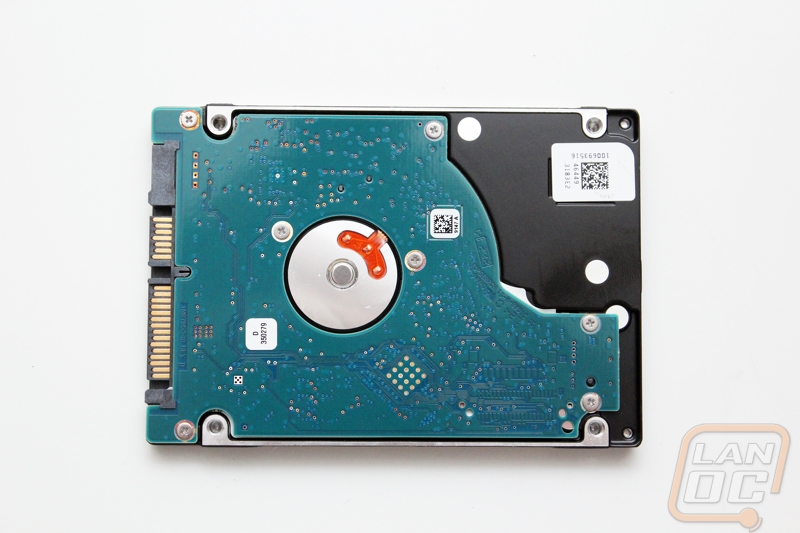
Aside from an SSD I was in need of a fast spinning drive to give me the space for installing all of the games I might end up playing at events. The last thing you want to happen is get to a LAN only to find out that you didn’t install what you needed to play, not only is it hard to get the bandwidth to download it once you are there, but you also will have to sit around waiting when you could be gaming it up. To prevent that I went with a Seagate SSHD hybrid hard drive for my game drive. Not only will that give me the capacity I need, but the hybrid design will still give me a boost in performance with game files that I load often, this means faster loading maps in your favorite games and quicker load times in LoL. All in an ultra-thin 7mm design that should hopefully fit well in the build I am putting together.
Video Card
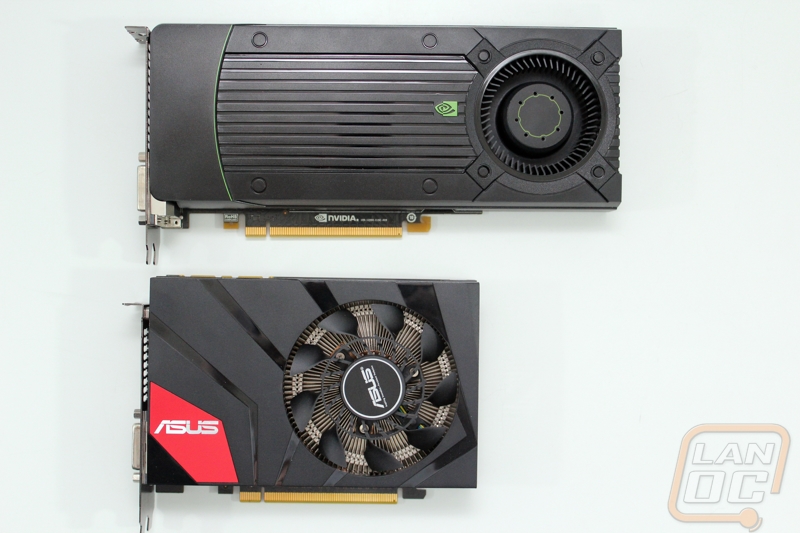
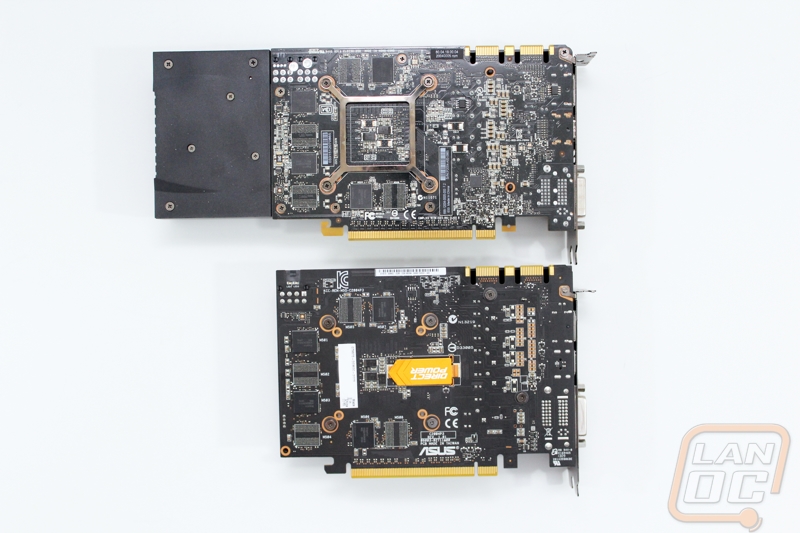
I hate to end things off on a short note, but I think it’s fairly obvious what video card I went with for Lunchbox 3. If you are looking to pack the most performance into the smallest package there really is only one card on the market available. That is the Asus GTX 670 DirectCU Mini that I reviewed a few weeks back. I highly recommend you check out the full review HERE. Even ignoring the fact that this is one of the only options available, I would have been leaning this direction anyhow. Asus put a lot of time into the DirectCU to design its cooling and their software support. It is details like those that help set them apart from their competition.
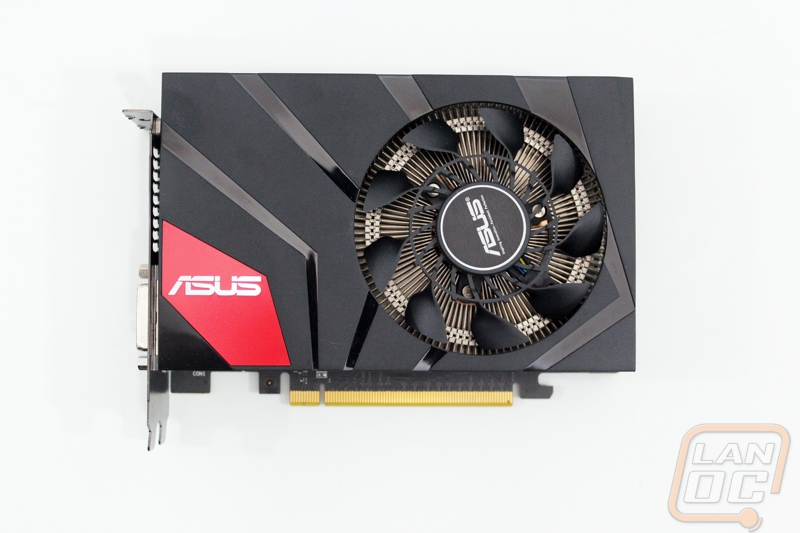
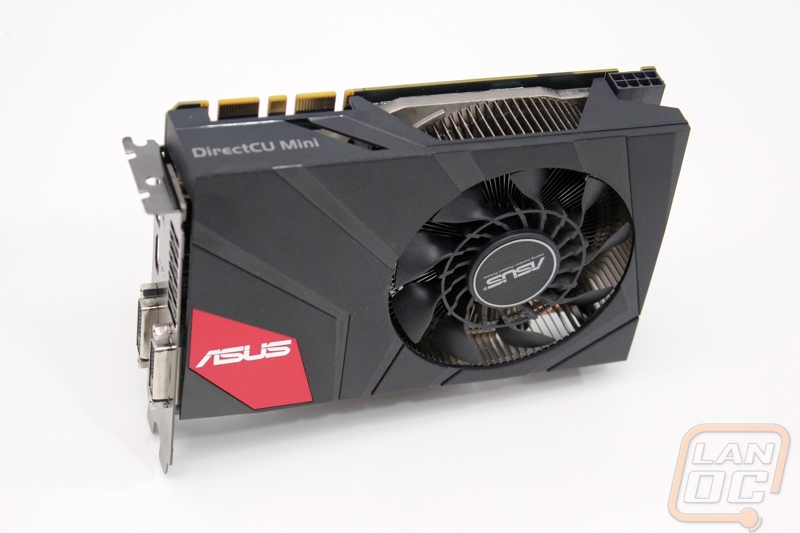
Here are a couple shots of the GTX 670 DirectCU Mini sitting next to the GTX 670 that I use in Lunchbox 2. This puts the size difference into perspective; this is a small card with the big card performance!